To Create an i-model Publishing Job
This is an example of how to create a job that will create i-models from source documents, but does not perform any transformations on the i-models.
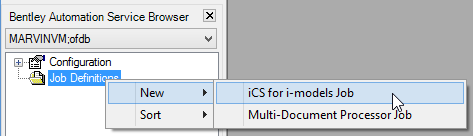
- In the Bentley Automation Service Browser, right-click the Job Definitions folder and select .
-
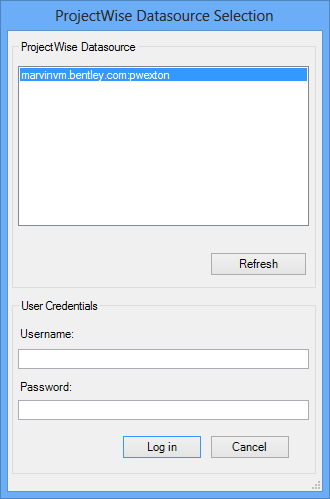
In the ProjectWise
Datasource Selection dialog, select and log in to the datasource containing the documents you want to process.
If the user is based on a Windows account, the user name syntax is Domain\user.name.
If your datasource is not in this list, you need to configure your ProjectWise network on this computer.
See the Bentley Automation Service Implementation Guide if you need to configure any of these things.
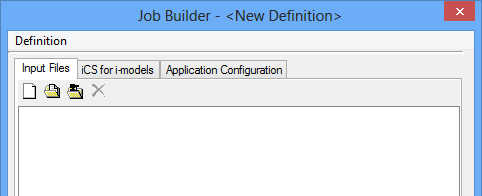
After logging in, the Job Builder dialog opens a blank job definition form for you to configure.
-
On the Input Files tab, use the icons across the top of the tab to add the items you want to process (documents, folders, and/or saved searches).
See Defining the Input Set for details.
-
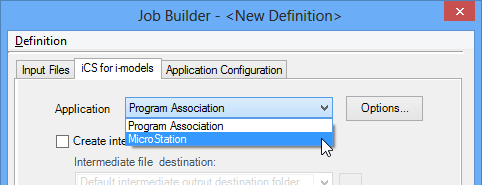
On the iCS for i-models tab, do the following:
-
From the Application list, either select Program Association, or select a specific application.
When you select a specific application, that application will be used as the i-model publishing engine to process all documents in the input set. When you select Program Association, documents in the input set that have an associated application installed on the server will be processed by that application, and documents in the input set that do not have an associated application installed on the server will not be processed (you will receive an error in the Job Monitor window for documents that do not have an associated application installed).
The specific applications listed are the installed Bentley applications that have the capability of publishing i-models, not necessarily those which have been tested with this release. See the Requirements section of the readme for a list of tested applications.
-
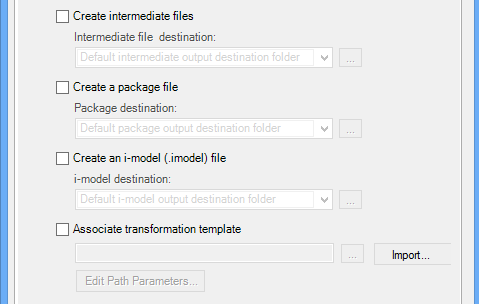
Turn on the option(s) for the type(s) of i-models you want to create:
- Create intermediate files - Turn on just this option if you want the job to only create published (intermediate) i-models.
- Create a package file - Turn on this option if you want the job to create packaged i-models. This option also turns on Create intermediate files, but you can turn off Create intermediate files if you do not want to keep the published i-models created by this job.
- Create an i-model (.imodel) file - Turn on this option if you want the job to create mobile i-models. This option also turns on Create intermediate files and Create a package file, but you can turn off Create intermediate files and/or Create a package file if you do not want to keep the published and/or packaged i-models created by this job.
-
Select a destination for each type of i-model this job will create.
Below each "Create" option is a list of destination profiles. Each profile is a template that tells the job where in ProjectWise to store that particular type of i-model, along with some additional instructions.
- Intermediate file destination - all published (intermediate) i-models will be stored in the folder specified in the selected profile
- Package destination - all packaged i-models will be stored in the folder specified in the selected profile
- i-model destination - all mobile i-models (.imodel) will be stored in the folder specified in the selected profile
A default, preconfigured destination profile is automatically selected when you turn on the option to create a particular type of i-model. If you need to edit the profiles, or create new ones, see Creating and Editing Destination Profiles.
- (Optional)
Click Options to change the default i-model publishing options for this job, including file protection settings, publishing settings, and how to name the new i-models created by this job.
See i-model Publishing Options Dialog for details.
-
From the Application list, either select Program Association, or select a specific application.
-
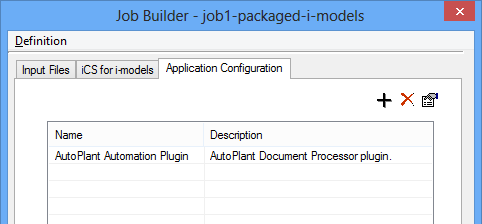
(AutoPLANT jobs only) — On the Application
Configuration tab, do the following:
- Click the Add Application Configuration icon (+) in the upper right corner of the tab.
-
In the Application
Configuration dialog, select the AutoPLANT Automation
Plugin and click OK.
The plugin is added to the tab.
- Select the plugin and click the Set Application Configuration Properties icon in the upper right corner of the tab.
- In the AutoPLANT Automation Application Configuration dialog, enter the user name and password of the AutoPLANT project that your documents are linked to.
- If the documents are coming from a particular project, turn on Project Includes PID Drawings passwords, then specify the Project ID and path to the Project Root folder. Make sure the path specified in the Project Root field contains a backslash ( \ ) at the end of the path.
- Click OK to close the AutoPLANT Automation Application Configuration dialog.
Note: Currently, the only delivered plug-in for configuring application-specific settings is the AutoPLANT Automation Plugin. If the documents you want to publish are AutoPLANT documents and contain information from an external database, or if the job contains briefcase mode drawings, then you will need to enter login credentials to the AutoPLANT project before running the job. -
Click OK on the Job Builder dialog.
-
In the Save As dialog, enter a name for the job and click Save.